For longer runs, or low-level signals, you may prefer a shielded interconnect. Here is a simple “recipe” for making a shielded interconnect. (Its hardly a recipe at all, really, but it’s useful to have something to point people to.) While you can buy your own cables made this way, and of course you’re welcome to, if you’re planning to make anything more elaborate then you should learn how to do one of these.
The ingredients:
- Switchcraft 3502A RCA plugs. These are available from various suppliers including Parts Express ($2 each of you buy ten or more). I read that they are pretty decent for inexpensive RCAs.
- Belden 89259 coax cable. This is an RG59/U 75-ohm satellite cable. It has an FEP (“Teflon”) dielectric and shield so it comes “audiophile-approved.”
- 1/4″ Techflex. You can get it on eBay, Parts Express, and various other places. The Techflex is entirely optional – I just think it helps give the cable a nicer finished look.
- Assorted bits of heatshrink.
Here’s a picture of a cable in various stages of assembly (click for larger):
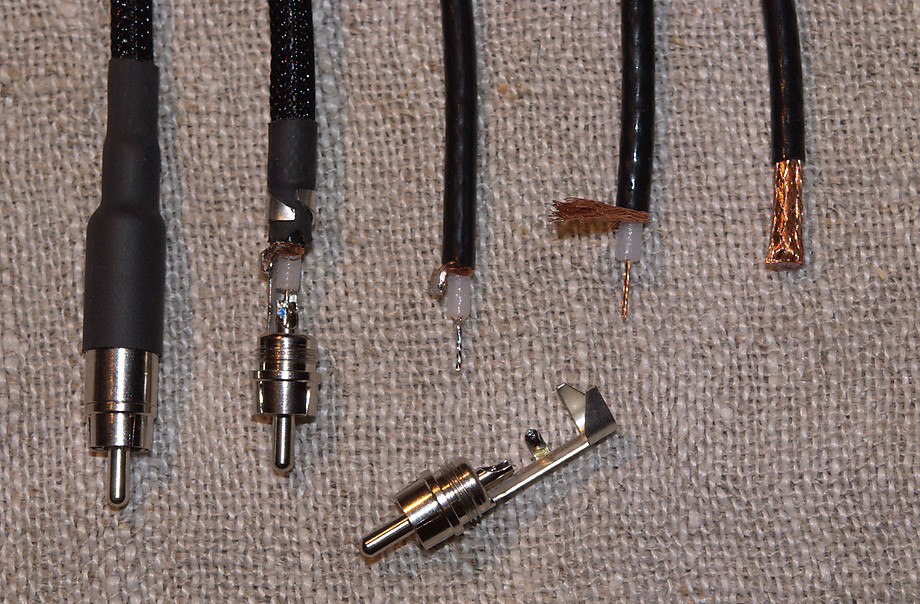
From right to left:
- Strip 15mm of the outer jacket. I use a sharp knife. Don’t hack into the braided shield.
- Using a pointed tool or a small screwdriver, unbraid the shield and work it to the side. Strip off 8mm of the center insulation.
- Shape the shield into a little “tab.” This will be a lot easier to see if you have the connector in your hand, but it solders onto the little tab on the connector shown below it. Tin the shield tab and the center conductor; also tin the corresponding tab and center hole on the connector.
- Slide a length of Techflex over the coax and cut it to length. Then slide a 2 cm length of heatshrink over that and shrink it. Note that the Techflex should not go under the crimping tabs – the barrel of the RCA is not large enough for you to do that. Examine the picture carefully (or just have a go and be prepared to do it a couple of times to get it right). Then solder the coax onto the connector. After soldering the shield and letting it cool, carefully trim the joint, as the barrel of the RCA is not very big and big lumps of wire will stop it from going on. Crimp the strain relief tabs over the heatshrink as shown.
- Slide the barrel over from the other and and screw it on. Slide over a larger diameter piece of heatshrink and shrink it on.
Finally, check that you don’t have a short. You have to be careful with shielded cable as it only takes one little strand of the shield wire to ruin the cable.
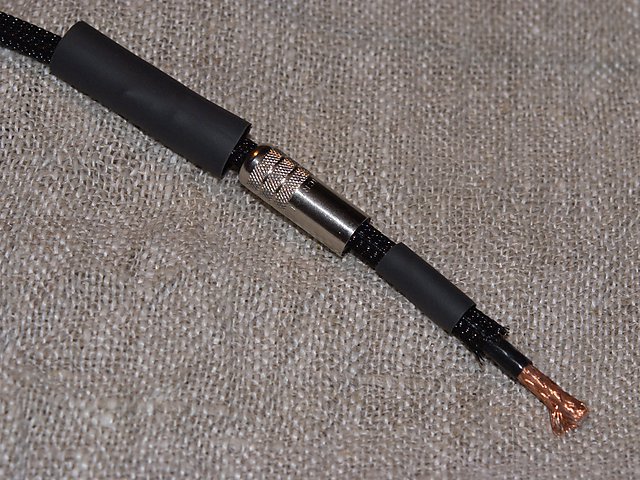
The “trick” with the other end is to get the parts on the cable in the right order before stripping and soldering. It’s not hard, but you do need to think about it a little. Here’s a photo of the relevant bits for this cable:
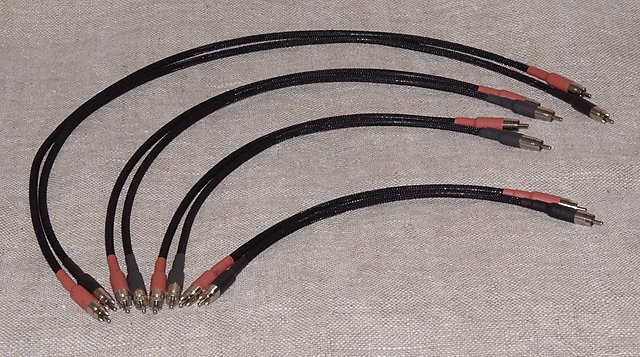
After you’ve done both ends, you’ll have a nice cable in whatever custom length you chose to make it! Here is a set that I made for my 4-way active system: