
There are loads of DIY cable recipes on the net. You can go to all kinds of lengths in making your own cables, searching for and purchasing ever-more exotic combinations of conductor, dielectric, shielding, and connectors. But, to start with, something that’s easy to make and cheap (since you’ll probably make some mistakes initially) is needed. So here’s a little tutorial on how to make a really simple, dirt-cheap interconnect from easily-available materials.
The interconnect I’m going to show here is quite short – around 25 cm. I never understood why the standard length for interconnects is a meter. Most of the time, the output RCA jacks are a few cm away from the input jacks of the next unit, and meter-long cables just get in the way. The rest of the time, a meter-long cable is too short! I like short cables also because they don’t (usually) need to be shielded and are therefore simpler to make. It’s hard to go wrong with a short cable, and if you end up with one not quite long enough, just make another pair.
Ingredients:
- Four cheap plastic RCA plugs, like these.
- A length of solid-core CAT-5 or CAT-6 network cable, like this.
- Some 1.5mm and 2.5 mm heatshrink, like this and this. (Optional.)
(Yes, the cheap plastic plugs.)
There are a couple of nice things about using the networking cable, apart from the low cost. One is that the conductors are solid core. (Stranded-conductor CAT-5 does exist but is less common.) The other is that the wires are already in a twisted pair, which inherently provides some electromagnetic shielding, as explained here.
1. Cut the CAT-5/6 cable to approximate length, say 25cm, and strip off a bit of the outer jacket. You should then be able to pull out the twisted pairs from the outer jacket.
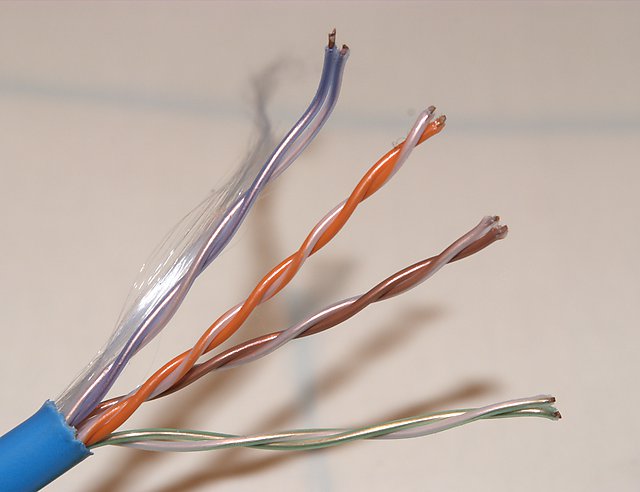
2. Take one twisted pair, and strip a few mm of insulation off both conductors. Tin them lightly with a soldering iron. (Already at this stage, I like to put the shell of the RCA plug over the cable so I don’t forget – that’s the red thing in this picture.)
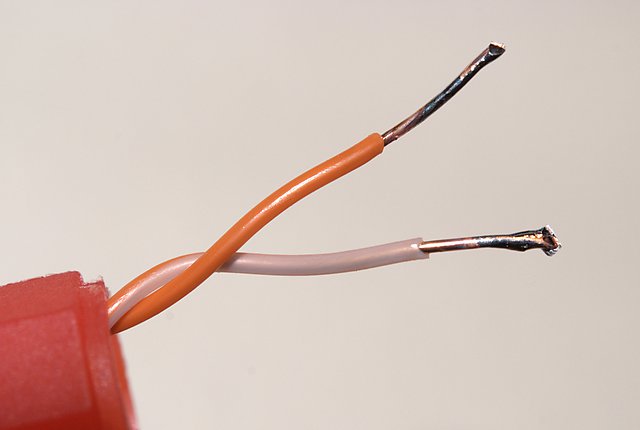
3. Bend the two conductors at right angles and stick them through the little holes in the tabs of the RCA plug. Then fold them over and gently crimp them (you want to try and get an electrical connection even without solder).
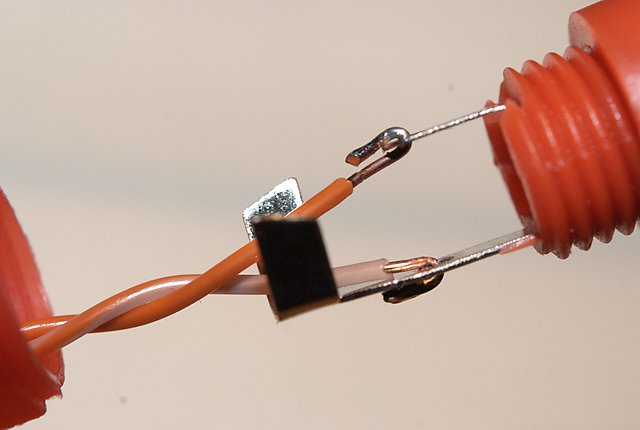
4. Solder the wires onto the tabs. Don’t use too much heat, or things will start melting! (The best way is to get the iron good and hot, then put a drop of solder into the tip. Place it against the tab right next to the hole with the wire; after a couple of seconds, you will be able to melt solder onto the joint. As soon as it “wets,” remove the iron.) Wait for everything to cool down and then, if you like, gently crimp the cable crimpy thing. (You don’t really need to do this, but if you do, don’t do it hard or you’ll make a short.)
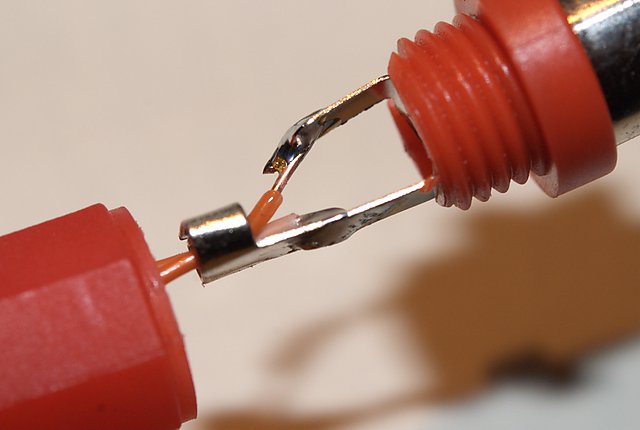
5. Use your multimeter on the RCA plug to check that you haven’t shorted the tip to the ground. If you have, you’ll have to try again. If all is well, screw the shell onto the plug, and do the other end. (Don’t forget to put the shell over the wire before soldering!) Then check with the multimeter that both ends of the cable are connected, for both tip and ground, and that tip and ground aren’t shorted together.
Then do another one in a different color, and you’re set!
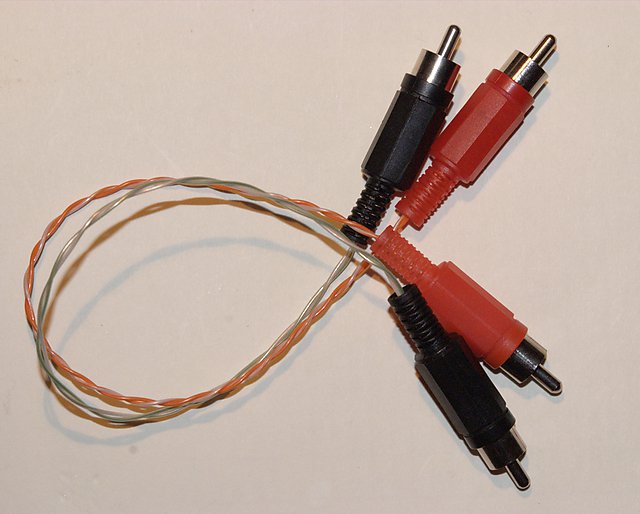
Total cost for this pair of interconnects: $2.90.
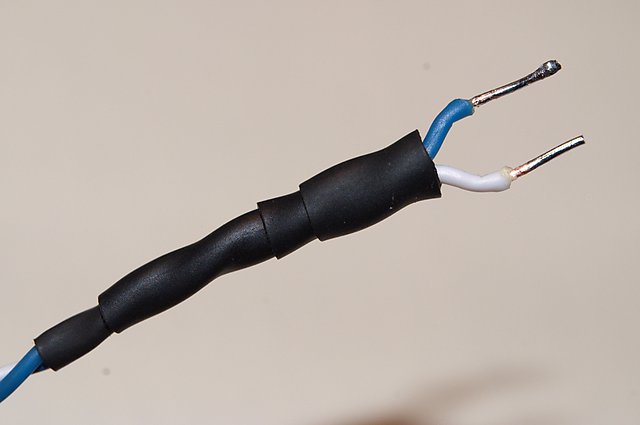
If you bought the heatshrink tubing, use it to cover the twisted pair before attaching the wires to the plug. Like this:
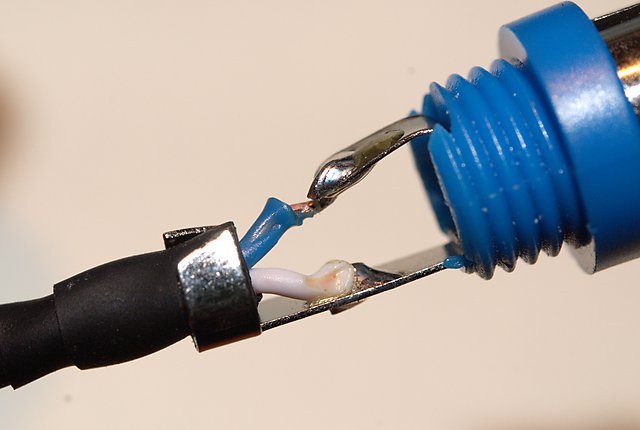
After soldering, you can put a firmer crimp on the heatshrink. The result looks like this:
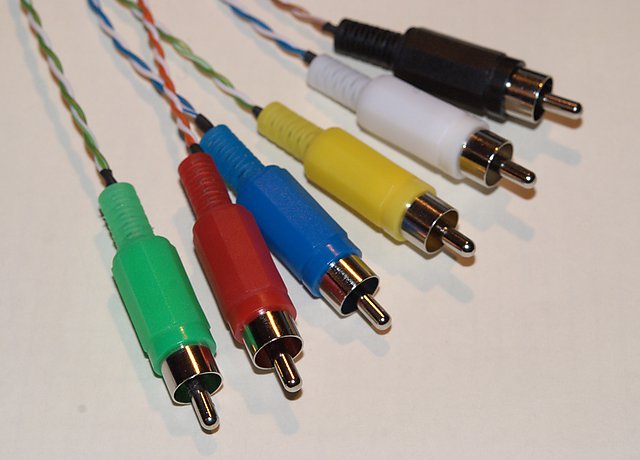
By the way, one nice thing about the cheap connectors is that they come in many colours, which can be useful sometimes, like say in a home theater system:
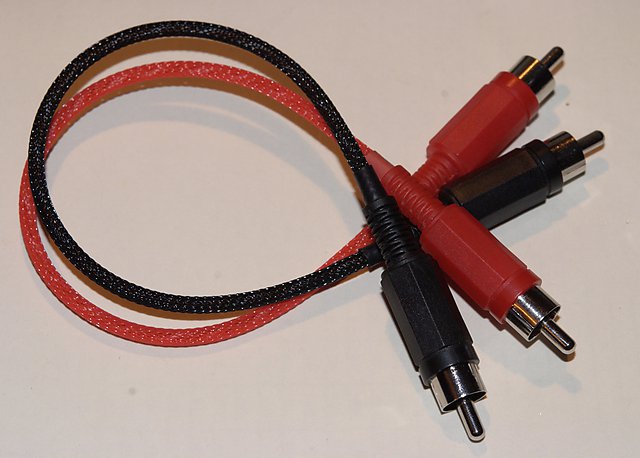
 Finally, you can gussy them up a bit with some TechFlex if you want:
OK, that’s it! How do they sound? Try it for yourself and tell me what you think 😉 If you like, the next step might be to hunt down some “Plenum grade” CAT-5 with Teflon insulation; Belden 1585A is commonly cited for DIY use.